Getting Started
Whether you’re an instructor looking to record an online address, a student recording a video for a presentation or an alumnus sharing your wisdom and experience with the hive, proficiency in self-taping is crucial in today’s online world. Below are some essential tips and tricks to create professional and engaging videos for lectures, events, and more.
Choose a recording device you’re familiar with

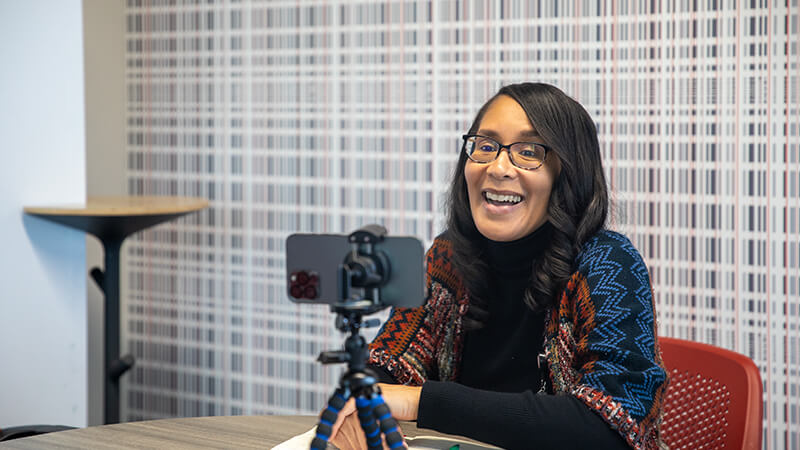
You may record your message on any device or software you’re comfortable with. Some options include propping up your cell phone on a stack of books or with a cell phone holder, using your computer or webcam and recording with your computer software, or using a DSLR or mirrorless camera or GoPro you may be familiar with.
Don’t worry too much about the technical aspects; however, if you’re familiar with your cell phone or other devices, we suggest going into your camera settings feature and clicking the option to record the video at 1920 x 1080p and 30fps.
If you need to hit the record button yourself, take your time to settle yourself and take a breath before starting to speak and after stopping your last sentence so the beginning and end of your clip can be trimmed off without the audience seeing you moving towards the camera.
Choose the right location
Choose a space to record that’s quiet and free from distractions. Pick an area you’re comfortable with the public seeing, and ensure your background is clean and uncluttered. The goal is for the audience to focus on you and your message.
If you choose to shoot outside, just be aware of gusts of wind that may hit your microphone and cover your words.
Find the best lighting
Bright light is always best for video recording, so use any natural light at your location. A room with windows facing you will provide excellent lighting. Make sure you’re facing the windows. If the windows are behind you, they will darken your face.
Room lights such as table lamps or desk lights are also good options. Place lights at eye level when using room lighting to avoid casting unnatural shadows on your face.
Consider the room acoustics
Clear audio is essential. Try to choose a smaller room that is less likely to bounce sound around. A larger room can work if it has carpet, curtains or upholstered furniture, as these are all sound-absorbing. Look for an area away from co-workers or children if recording from home. Sound levels can be boosted in editing, but reducing ambient noises is more challenging.
Camera placement

Set up your device about 2-3 feet away from you. If you can stretch your arm out and just about touch your camera, that’s probably good placement for framing and your device’s microphone.
When adjusting your shot, be sure you don’t have too much headroom above your head in the frame or that you’re cutting the top of your head off.
Try to prop your recording device up at eye level. Many of us are used to seeing ourselves in online chats from a computer webcam, but these are often placed above or below the eye line, which distorts the face shape.
When speaking, try looking directly into the lens and not the screen, as the lens is where the audience is viewing from, and you’ll want to be looking at them. Glancing away or looking at your notes is perfectly acceptable.
Unless you’re recording a video specifically for social media reels or stories, record your video in “Landscape” (your phone is on its side), NOT “Portrait” (where your phone is upright). Upright videos are great for some social media channels, but shooting videos in the horizontal position is best for most projects.
Recording your video
Once your shot is set up, you’re ready to tape! Looking into a camera lens and delivering a short message isn’t the most natural feeling, but there are ways to look and feel your best:
- Know what you plan to say – be familiar with the speech you will give. Give yourself time to practice your responses out loud. And if you stumble, pretend you’re in front of an audience and just keep going. You can give yourself as many takes as you want.
- Dress for the occasion – Please wear appropriate attire for what you’re promoting in the video.
- Relax and smile! This document has a lot of information, but the most important thing to remember is that we’re here to get to know you and hear your message. If you bring your warmth and your personality to your message, it will be great!
Submitting your video
Once you’ve recorded a video you’re happy with, please share it through Google Drive, as most email platforms will compress your video file, making it smaller with low video quality. Be advised – uploading your video from your phone may take a very long time if your internet speed is slow.
- Open the Google Drive app on your iPhone or iPad (you will have to download the app to your phone if you haven’t already).
- Tap Add.
- Tap Upload.
- Find and tap the video you want from your camera roll.
- Tap Upload.
- You’ll see a status bar at the bottom of your screen. Tap Locate to view your file.
- On your Android phone or tablet, open your photos app.
- Select the video you want to upload.
- Tap Share.
- Tap Save to Drive (you will have to download the app to your phone if you haven’t already).
- Tap Save.

